
 ひで
ひで素敵な思い出も写真や動画ではなく、そろそろカタチで残す時代が来るのかもしれませんね・・。
ここ最近、フォローしているブロガーさんたちが上手に3Dプリンターを活用されているのを拝見することが増えてきました。そろそろ自分も手を出してみようかとていたそのタイミング、今回素敵な声を掛けていただきました。
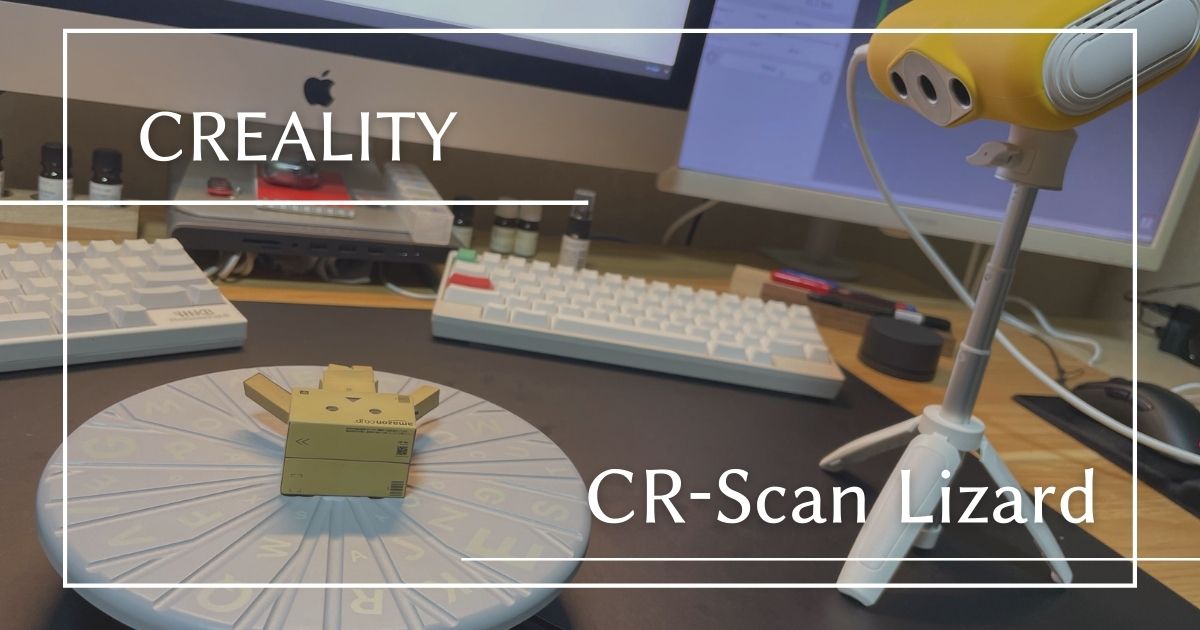
それが現在Makuakeにてプロジェクト掲載中のコンパクト3Dスキャナー「Creality CR-Scan Lizard」。
「誰でも簡単に・届いたその日から」と「最高の3D体験」の両立を特徴とする最新の3Dスキャナーです。
今回はこちらのテスト機をお借りすることができました。
\ 5月30日にてプロジェクト終了 !!/
 ひで
ひでですが、僕にとって3Dプリンターどころか、3Dスキャナーなんてのはまったくもって右も左もわからない世界。。
そこで本記事は「ほんとうに僕のような完全素人でも手軽に3Dスキャンを楽しめるのか?」をテーマにCreality CR-Scan Lizardを試してみた結果をまとめることにしてみます。
- 届いたその日から使える手軽さと高精度を両立する最新3Dスキャナー
- ほんとうに「まったくの素人」でも手軽に使えるのか?を検証
- Makuakeプロジェクトでの限定価格は「5月30日」まで!
\ 5月30日にてプロジェクト終了 !!/
結論|ほんとうに届いたその日から使えますか?
こんな僕ですので、本製品「Creality CR-Scan Lizard」や3Dスキャナーについてのアレコレをお話したところで説得力はないでしょう。
なのでまずは単刀直入に「実際、どうだったの?」といったところをお伝えすることにします。
ひでほんとうにその日のうちに使えました! それも思った以上に簡単に。でも、残念なこともありまして・・。
ここが残念
(追記)2022/5/25
プロジェクト運営者様に対応いただき無事に下記の問題は解消されました。
これでMacでもジャンジャン3Dスキャンできるように。
 ひで
ひでおかげで念願のノートPC&コンパクトなスキャナの強力タッグでより自由自在な3Dスキャンを楽しむことができそうです♪
これでCreality CR-Scan Lizardの「いつでもどこでも」なメリットをより活かせます。しばらくいろいろ遊んでみます。
まずは残念だった点から。
1つ目。実はウチの環境ではMacでの検証を進めることができなかったこと。 (2022/5/25 問題解消済み)
Creality CR-Scan Lizardの対応OSは「Win10 64bit/MacOS 11以降」です。
そこで2台のIntel Mac(macOS 11 Big Sur / macOS 12 Monterey)で試してみたのですが、記事執筆現在、いずれも期待する動作にはたどり着けていません。
今回は日程の都合もあり、原因の究明には至らずにいったん断念。以降はWindowsPCのみで検証を行います。
ただし、Macで動作しないというわけではなく、例えばこちらのブロガーさんの環境では問題なく動作していたとのこと。(M1 Macを使用されています。)
残念な点の2つ目。それにともない「Creality CR-Scan Lizard」のメリットを活かし切ることができなかったこと。(2022/5/25 問題解消済み)
今回は急遽、WindowsPCのみで検証することになりました。ですが、現在手元にあるWindows機はあいにくすべてデスクトップマシン。結果、作業場所がかなり限定されることに。
ひでというか、狭い仕事部屋の片隅でしか作業できませんでした・・。
というのも、「Creality CR-Scan Lizard」には以下のような屋外に持ち出して使用するのにうってつけの特徴があるんですね。
- 直射日光が当たる明るい場所でもスキャン可能
- 缶ビールの重さ並みに軽量なコンパクトボディ(約370g)
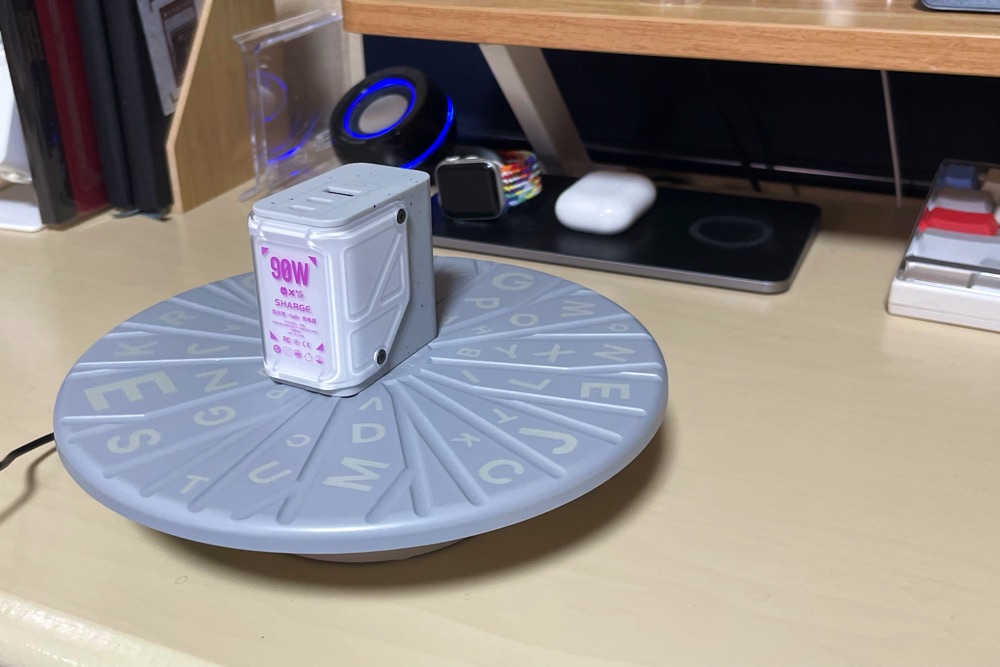
- モバイルバッテリーにも対応

つまり、いつでもどこでも自由に3Dスキャンができる!ってことだよね。
これは明らかに「Creality CR-Scan Lizard」の強み。このせっかくのメリットを体験できなかったことはかなり残念でした。
ひでできれば「そこそこ以上のスペック」のノートPCと組み合わせた機動力を楽しんでみたかったですね。
とはいえ、今回一番確かめたいのは「ほんとうに僕のような完全素人でも手軽に使えるのか?」です。
その結果はと言うと・・・
ここが良かった
ひでこれがびっくりするくらいスムーズに3Dスキャンを初体験できました♪
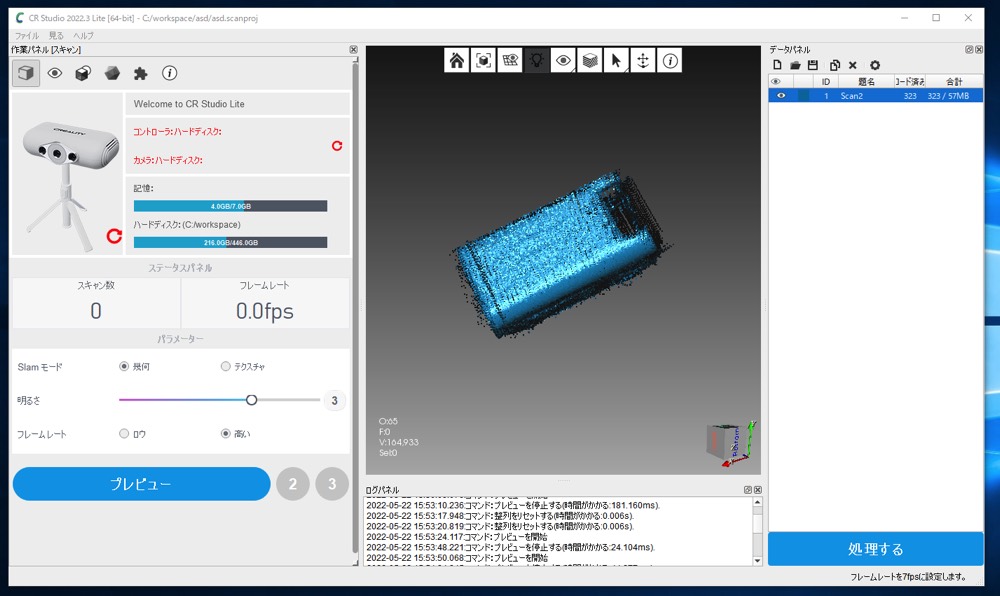
ほぼ初見の状態でも以下のような3Dデータがあっさりと完成します。
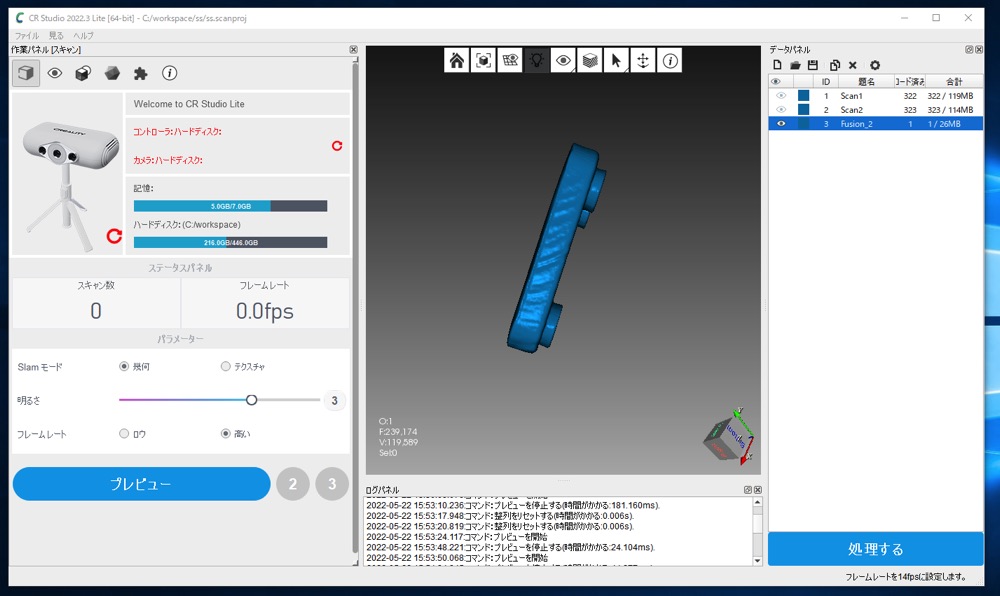
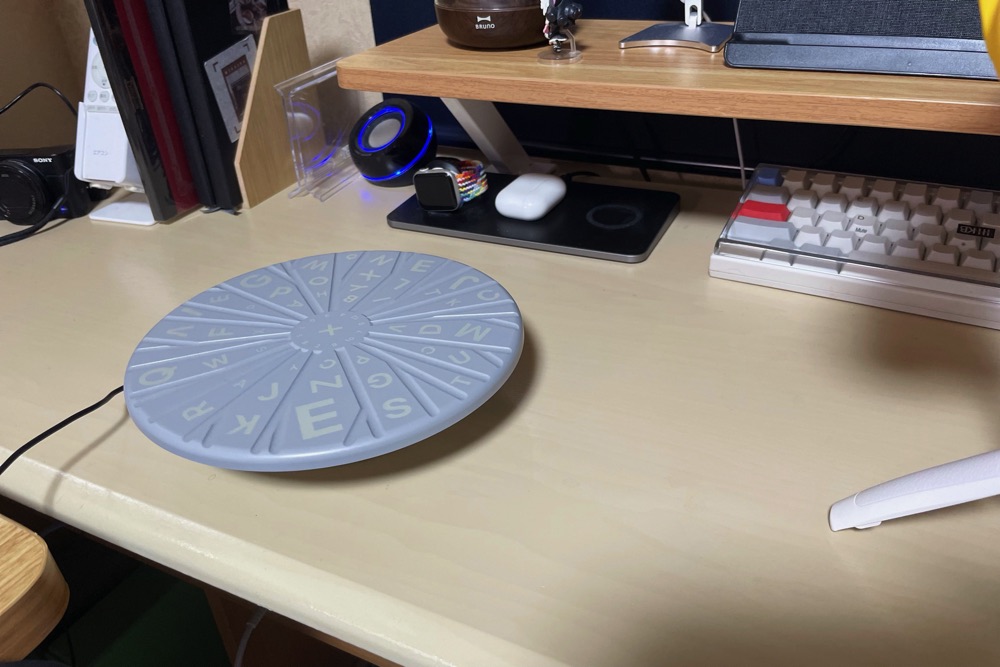
ちなみに上記でスキャンしているのはこちら。
ということで、ここからは「Creality CR-Scan Lizard」の3Dスキャンが如何に簡単でお手軽なのかをご紹介します。
3Dスキャンの手順|初心者でも驚くほど簡単!?
「Creality CR-Scan Lizard」の3Dスキャンの方法とその手順を進める様子をまとめました。
ひでCreality CR-Scan Lizardを使った3Dスキャンがどれだけ簡単かを感じてみてください。
スキャンモード
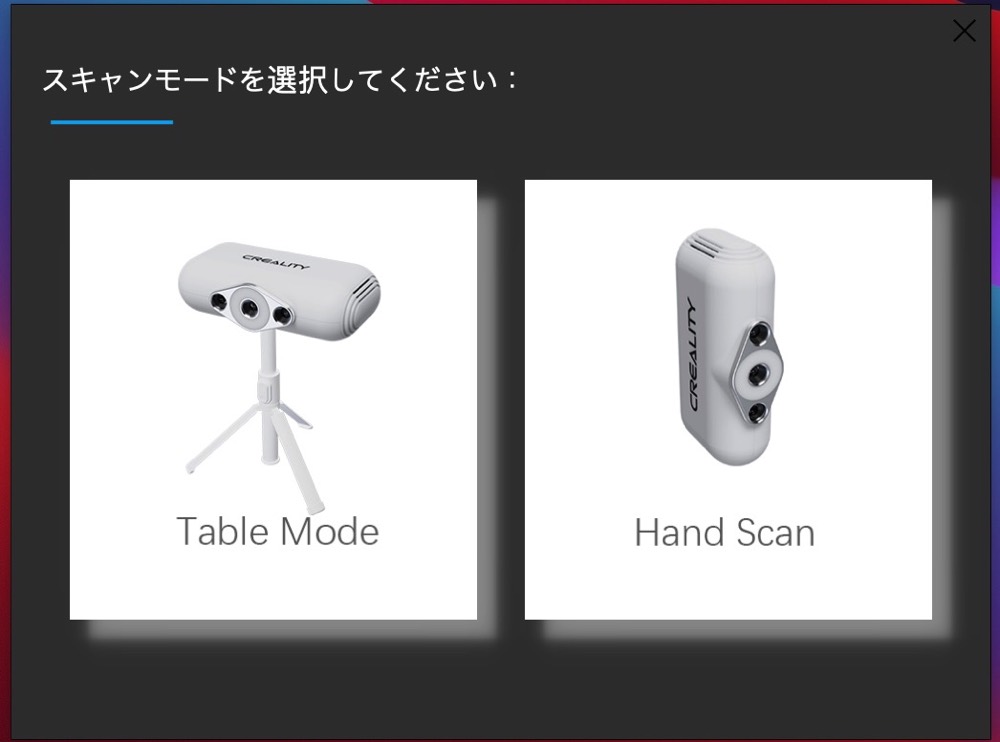
Creality CR-Scan Lizardには「テーブルモード/ハンドヘルドモード」とその両者を組み合わせた「組み合わせモード」の3つのスキャンモードがあります。
このモードは基本、スキャンする対象の大きさによって選択するみたい。
| モード | 対象物のサイズ |
|---|---|
| テーブルモード (ターンテーブル+三脚) | 15mm – 300mmの対象物 |
| 組み合わせモード (ターンテーブル+手持ち) | 15mm – 300mmの対象物 |
| ハンドヘルドモード (手持ち) | 500mm – 1500mmの対象物 |
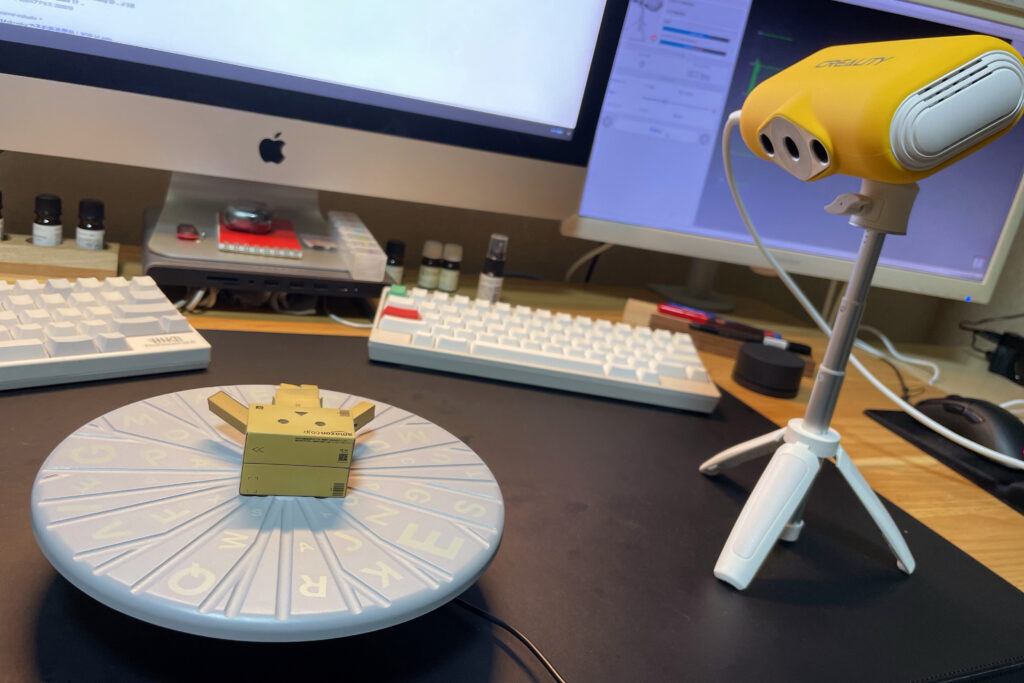
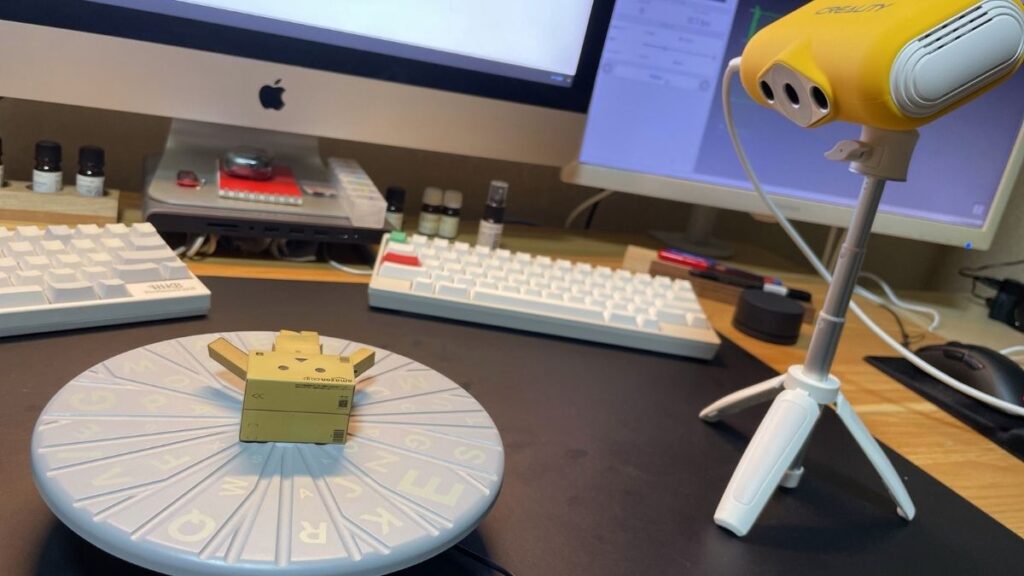
ターンテーブルの上に小物を載せた「テーブルモード」で3Dスキャン。3Dスキャナーは付属の三脚で固定しています。
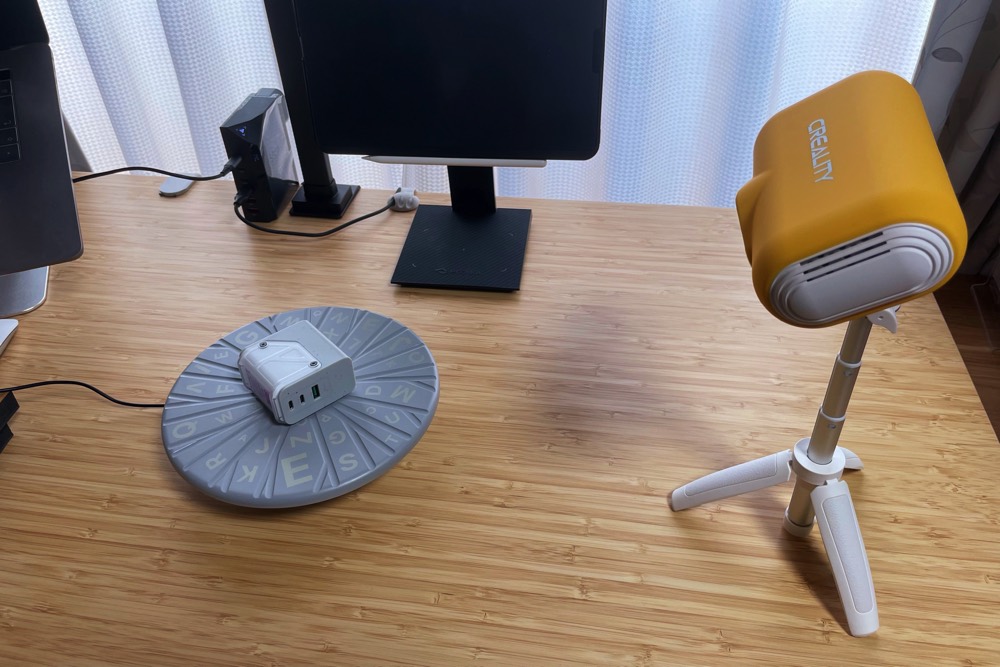
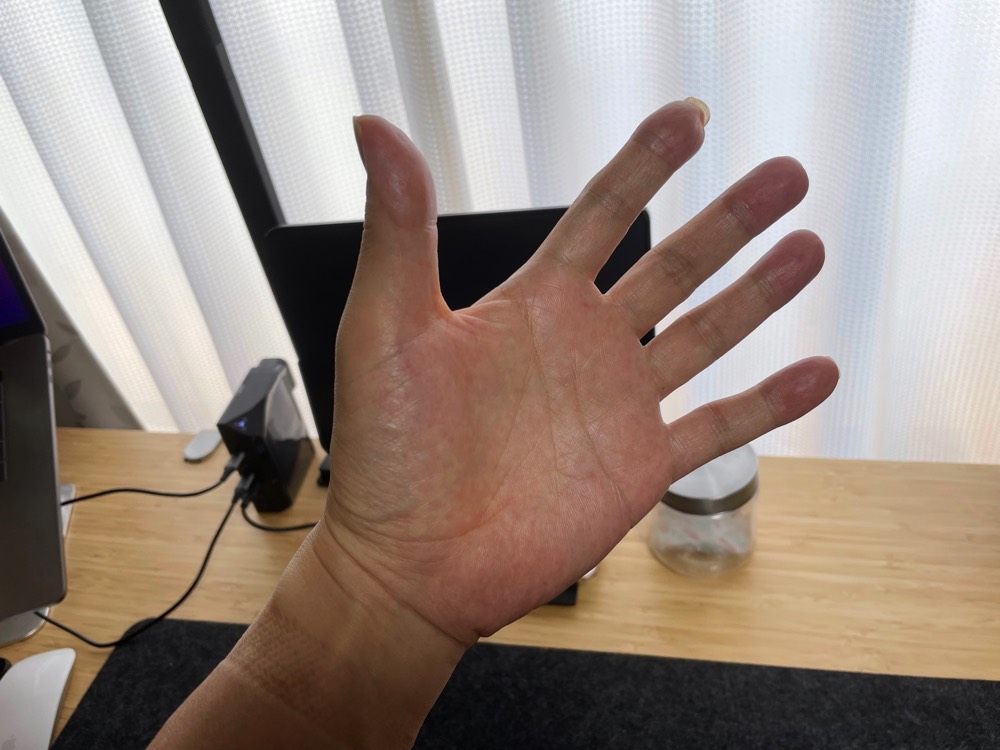
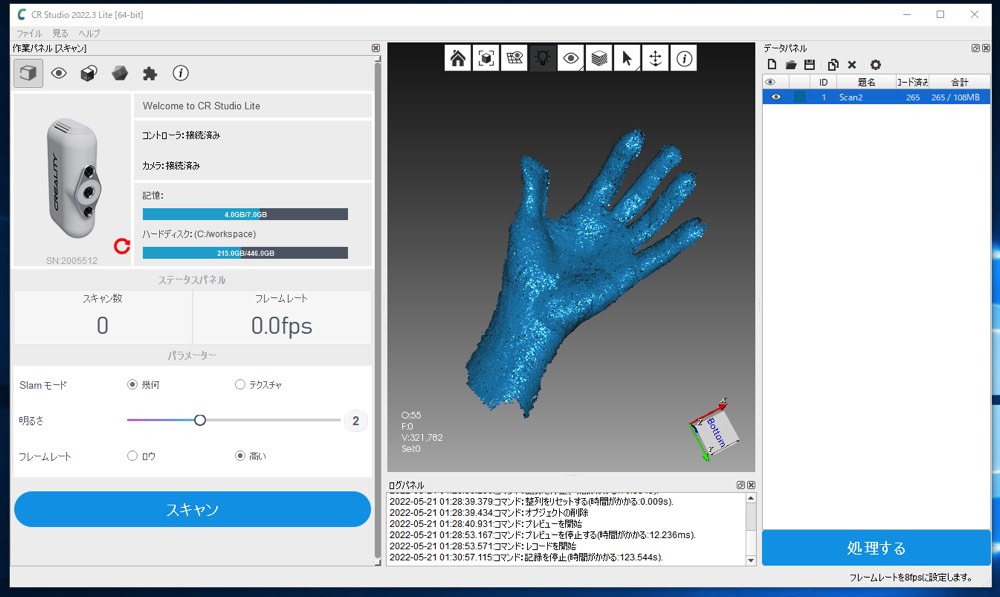
自分の手のひらや彫像など大きめの対象物はスキャナーを片手に持つ「ハンドヘルドモード」でスキャンします。
 ひで
ひでコンパクトなCreality CR-Scan Lizard。片手でも取り回しは楽々です♪
スキャンの手順(テーブルモード)
今回は「テーブルモード」でスキャンを行ってみます。
3Dスキャンの手順
- プレビュー
- 初期化
- スキャン
- データ処理
- 各種ソフトで活用
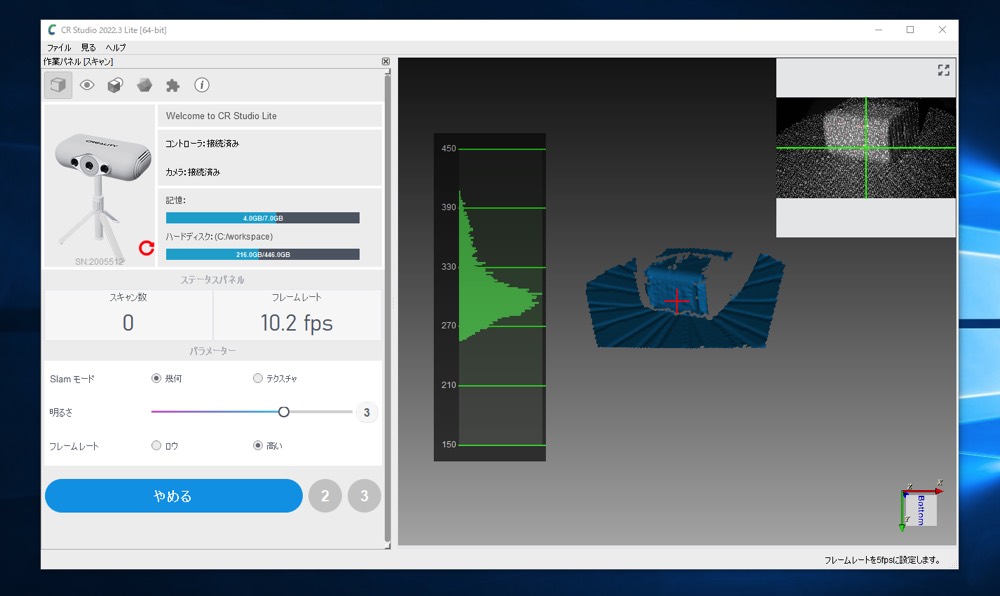
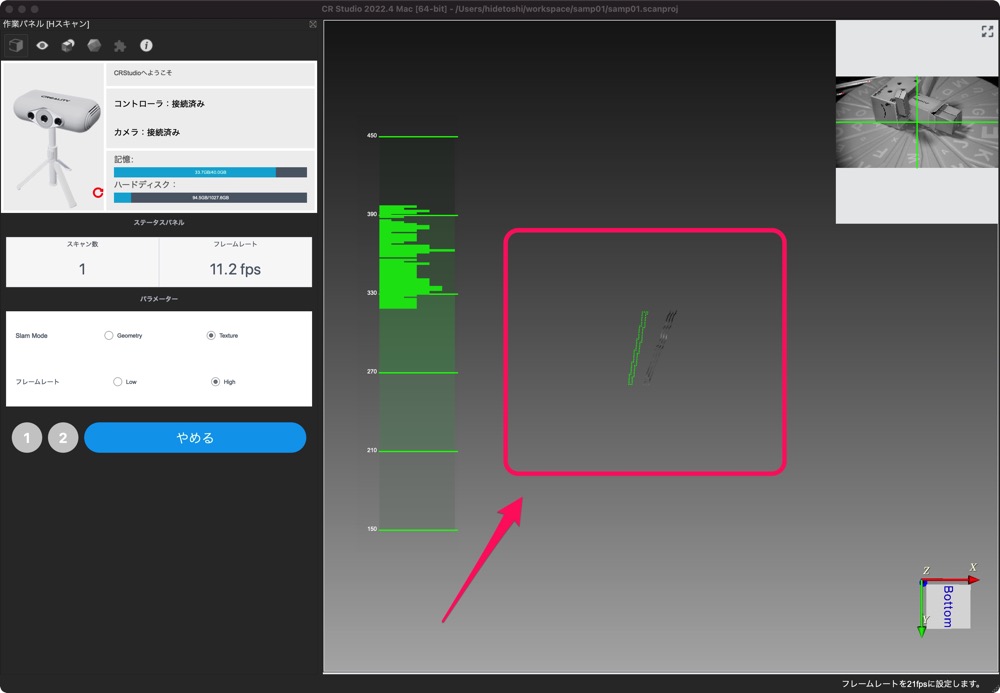
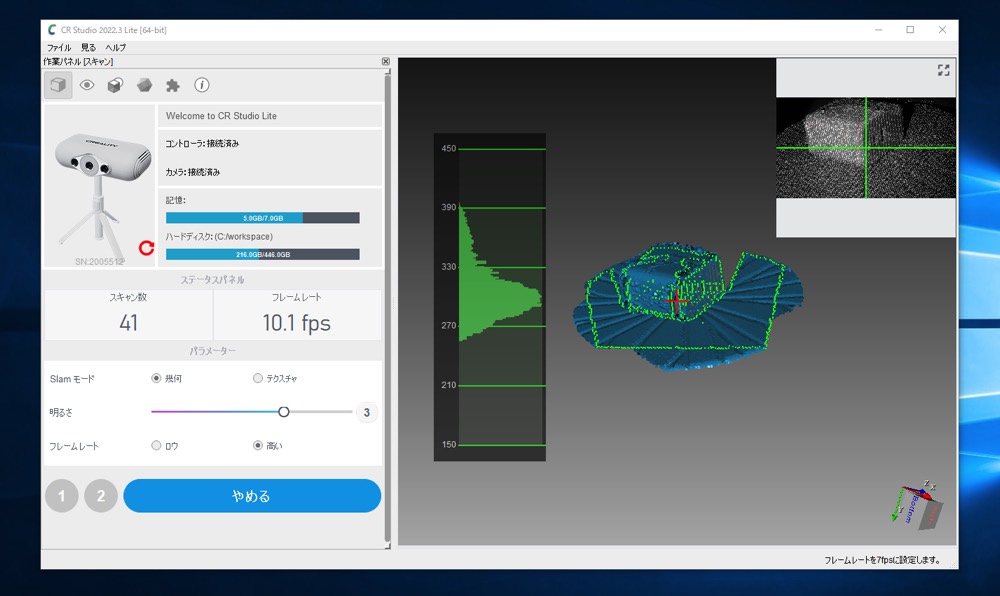
最初に対象物とスキャナーの位置合わせを行います。
スキャナーとターンテーブルの距離と角度を調整し、対象物をソフトの3Dビュー内に収める作業です。
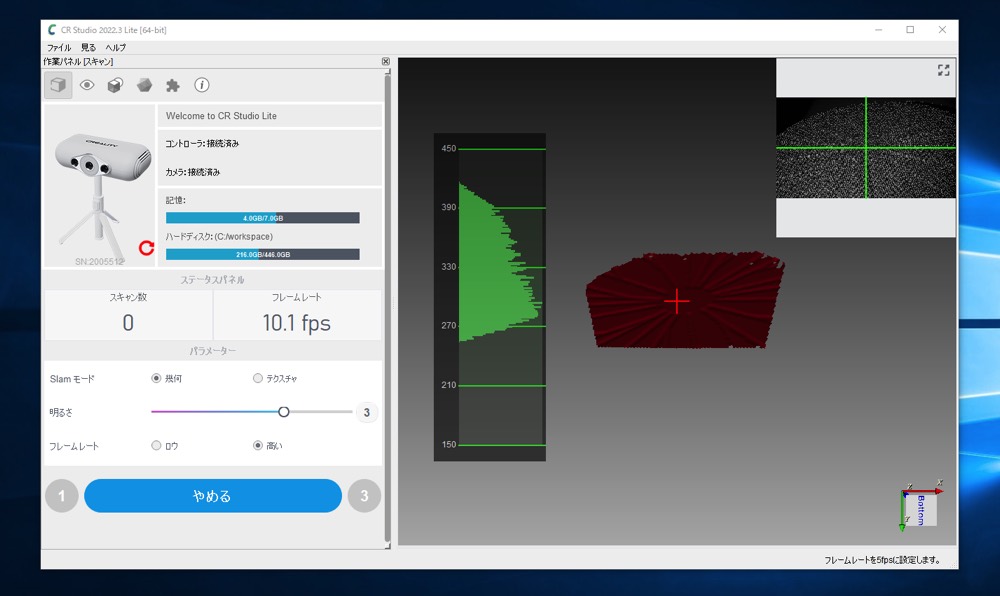
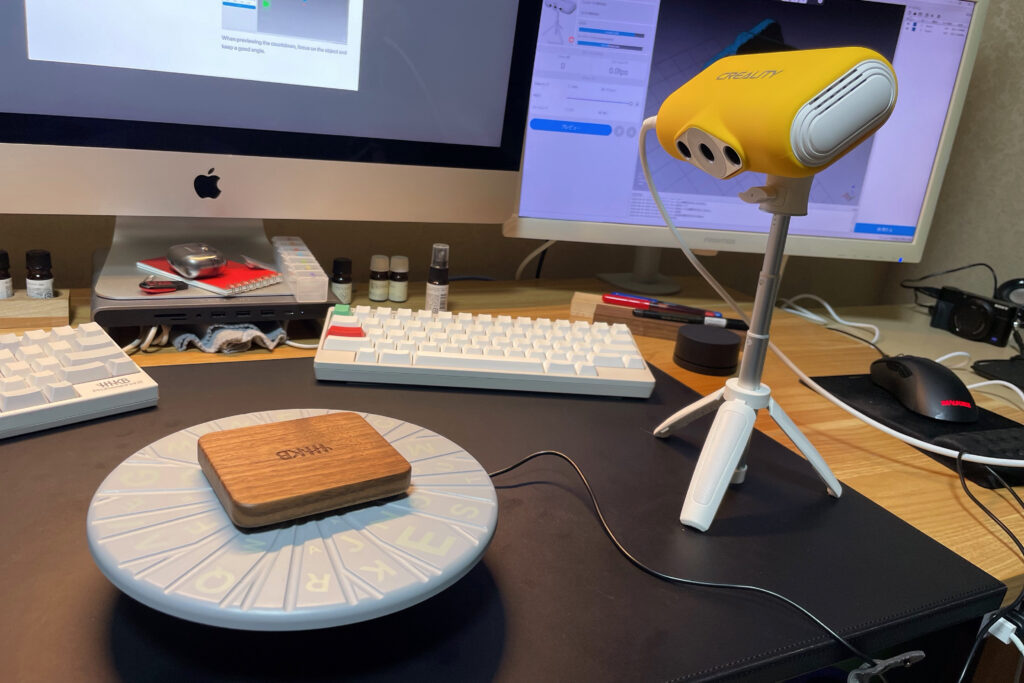
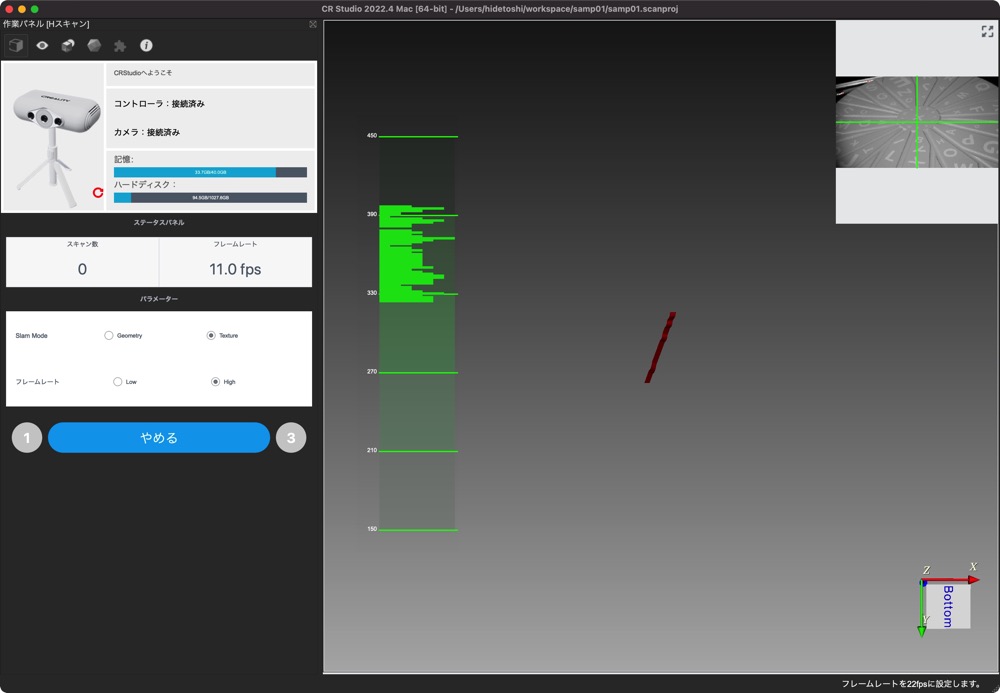
続いて対象物を取り除いた状態でスキャンを行うことで、ターンテーブルの位置を専用ソフトに読み取らせます。
ひでソフト上ではターンテーブルが赤色で認識されてるね。
これでスキャンした対象物からターンテーブルが自動で除去できるらしい。賢い。
以上でスキャンのための準備は完了です。
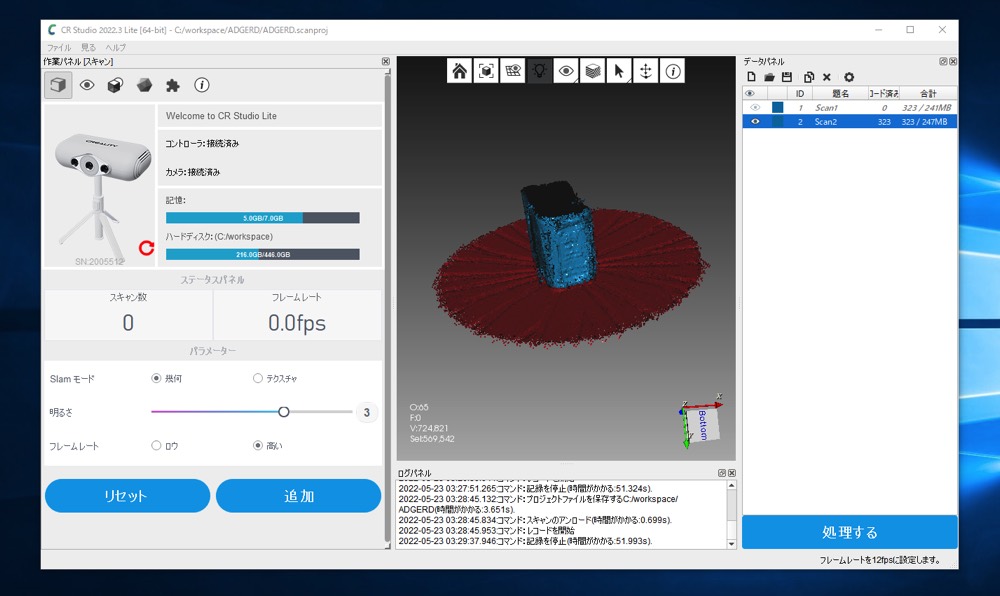
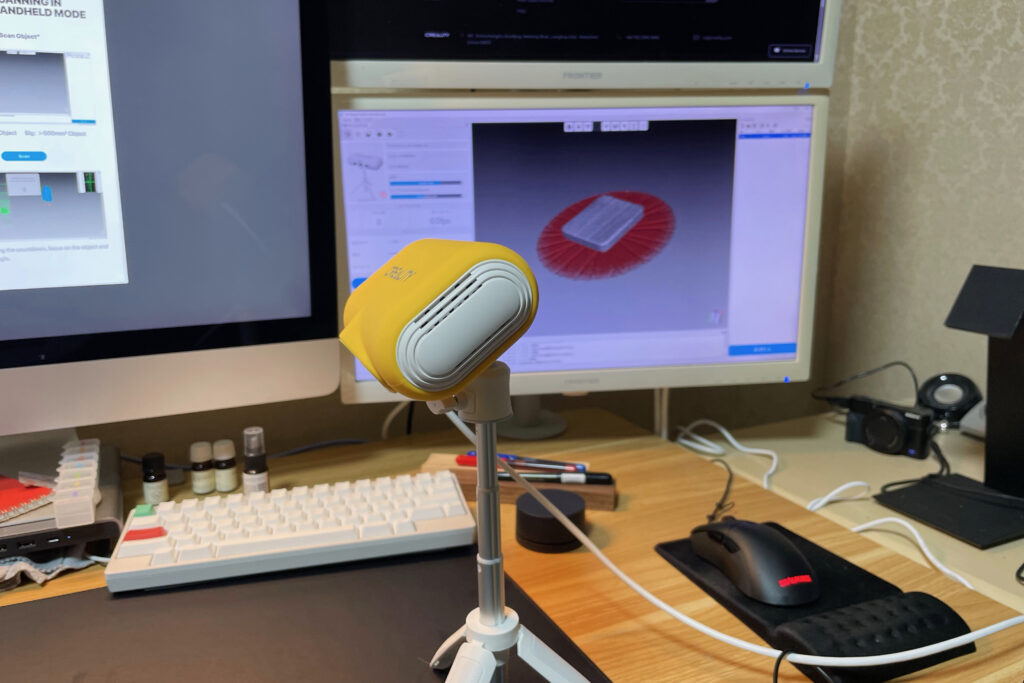
あらためて対象物をスキャンします。
対象物は角度を変えながら複数回スキャンを行います。
上記のようなシンプルな形状のものであれば2回のスキャンでおおむね問題なさそうです。複雑な形状の対象物の場合はより多くの角度から複数回のスキャンを行うことでその精度を高めます。
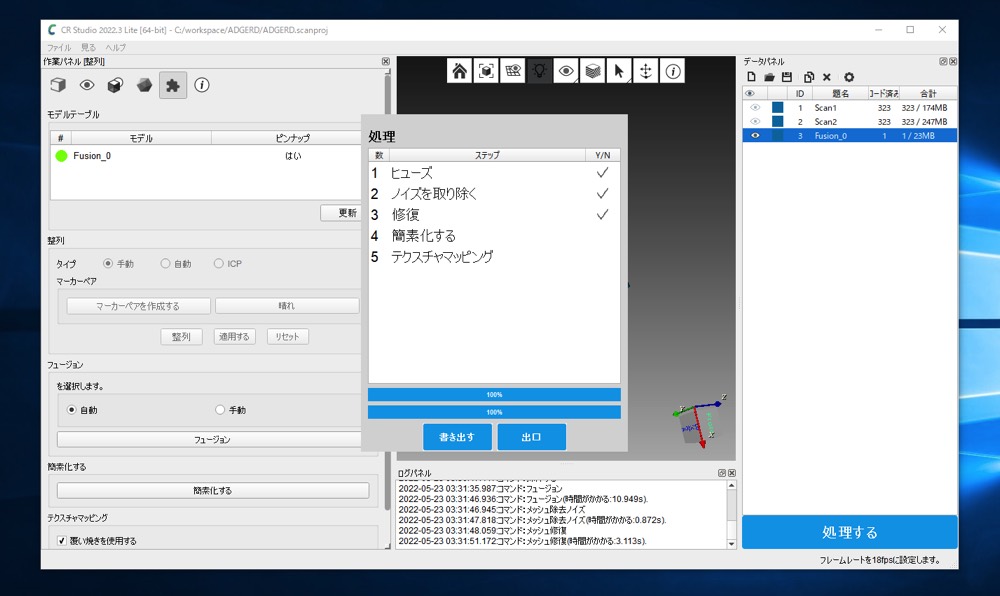
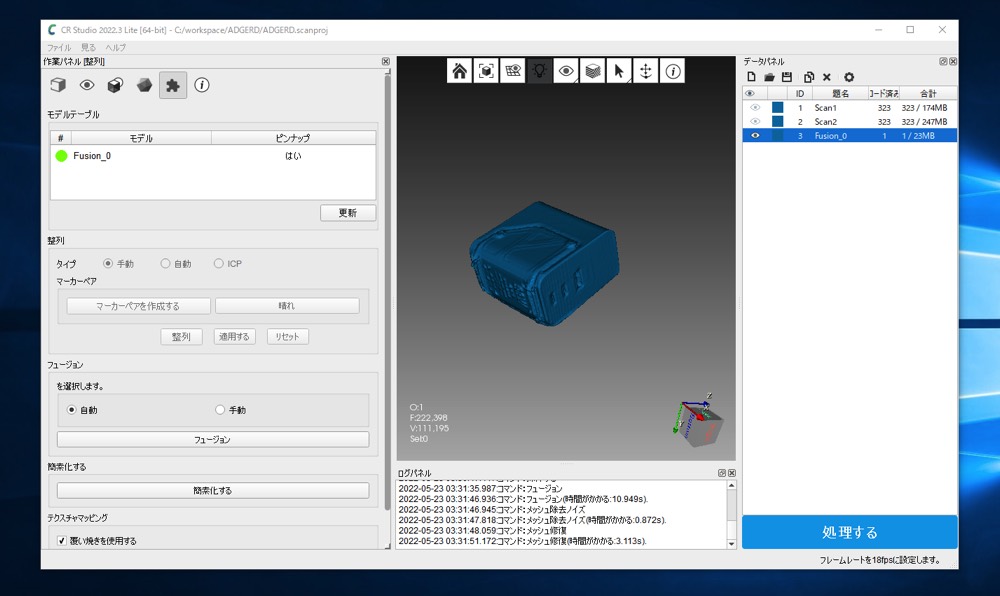
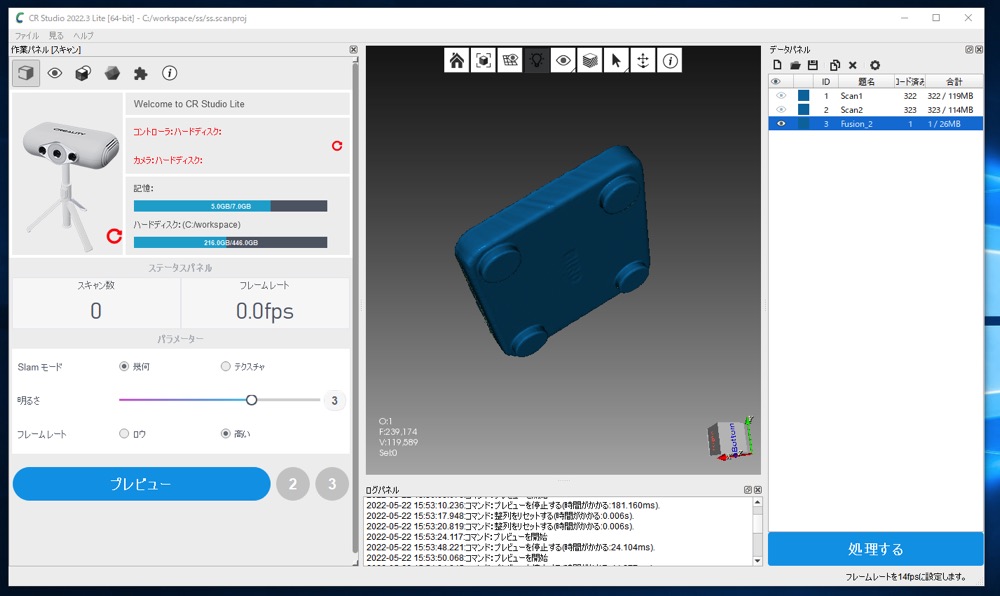
スキャンを終えると専用ソフトが自動でデータ処理を開始。先ほど角度を変えてスキャンした複数のモデリングのデータを統合します。
ノイズ除去や各モデリングの位置合わせなどは専用ソフトが自動で処理(自動調整)。自動調整が上手く行かないときは手動での調整も可能です。
以上「プレビュー」〜「データ処理」までの4つのステップで対象物の3Dスキャンは完了。
ここまでの作業は初日のほぼ初見の状態のまま、特に問題もなく進めることができました。
スキャンの手順を簡単に整理すると・・
- 3Dスキャンの前の下準備(プレビュー、初期化)
- 対象物を角度を変えて何度かスキャン
- 専用ソフトが自動でデータ処理
ひでここまでの操作は専用ソフトの指示に従って進めただけ。その専用ソフトの操作も基本、ボタンをクリックするだけです。
正直、拍子抜けするほどに簡単でした。
スキャンした3DモデルはOBJ/STL/PLYの3つのファイル形式で出力可能。
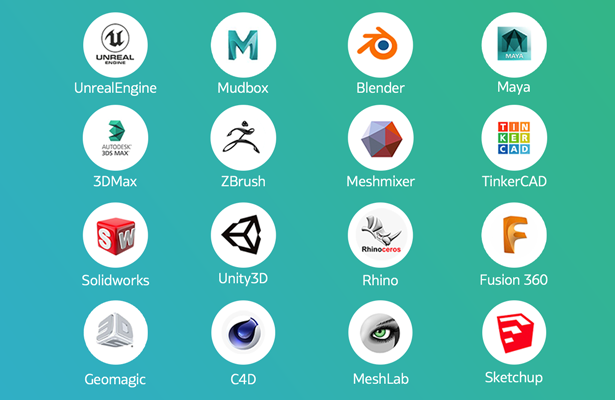
ひで僕のような素人でもスムーズに3Dデータを作成し、Blenderで編集するといった流れが作れます♪
まったくの素人でもすぐに3Dモデルが作れてしまう! その手軽さ&簡単さ、感じていただけましたでしょうか?
Crealityでスキャンされた3Dデータのサンプルは下記のURLからも確認できます。
<Crealityでスキャンしたデータの一部>
https://sketchfab.com/CrealityEcosystem
製品概要|Creality CR-Scan Lizard
リアルすぎる3Dモデルを誰でも簡単に作れます!年間120万台の出荷実績を誇る3Dプリンターの専門家Creality社から、最新コンパクト3Dスキャナー「Creality CR-Scan Lizard(クリアリティ シーアールスキャン リザード)」が遂に日本上陸!今までにない快適で、あたらしい3Dデータ体験を楽しんでください!
Makuake製品プロジェクトページ
\ 5月30日にてプロジェクト終了 !!/
製品仕様|Creality CR-Scan Lizard
| 製品名 | Creality 3Dスキャナー |
| モデル | Creality CR-Scan Lizard |
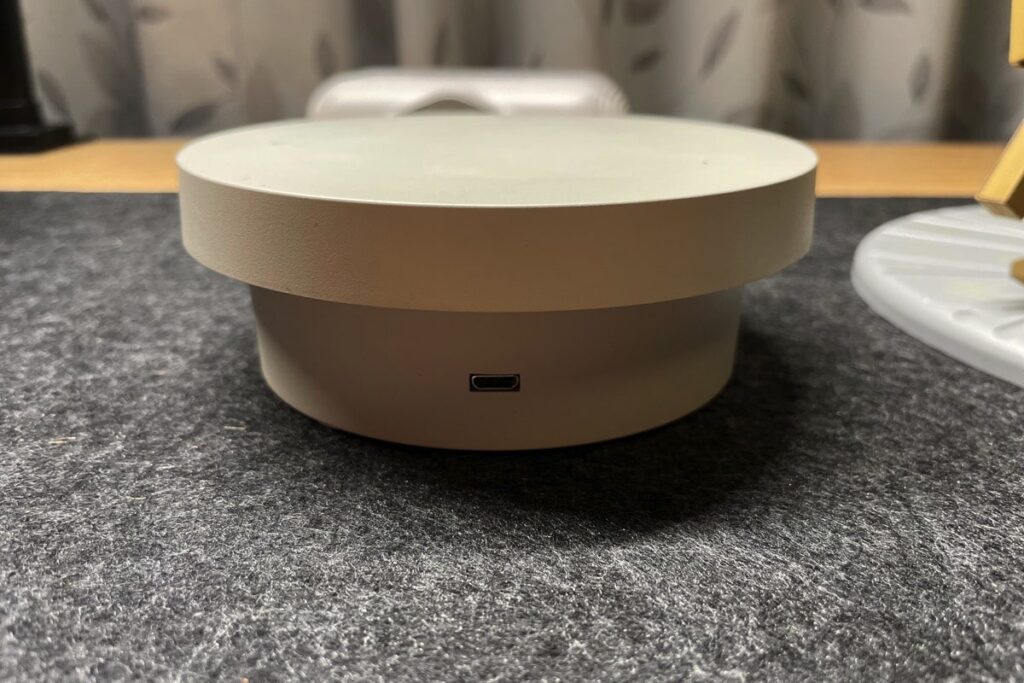
| 製品サイズ | 155mm×84mm×46mm |
| 製品重量(本体) | 370g |
| 精度 | 0.05mm |
| シングルキャプチャ範囲 | 200mm×100mm |
| 点群データ間隔 | 0.1mm-0.2mm |
| スキャン可能最小体積 | 15mm×15mm×15mm |
| スキャン可能最大体積 | 1500mm×1500mm×1500mm |
| スキャン速度 | 最大10fps |
| スキャン距離 | 150mm-400mm |
| 光源 | LED + NIR |
| 位置合わせ方式 | 全自動視覚追跡 |
| 出力形式 | OBJ/STL/PLY |
| 対応OS | Win10 64bit 8G MacOS 11以降 8G (M1チップには7月以降に対応予定) |
| 生産地 | 中国 |
付属品の確認
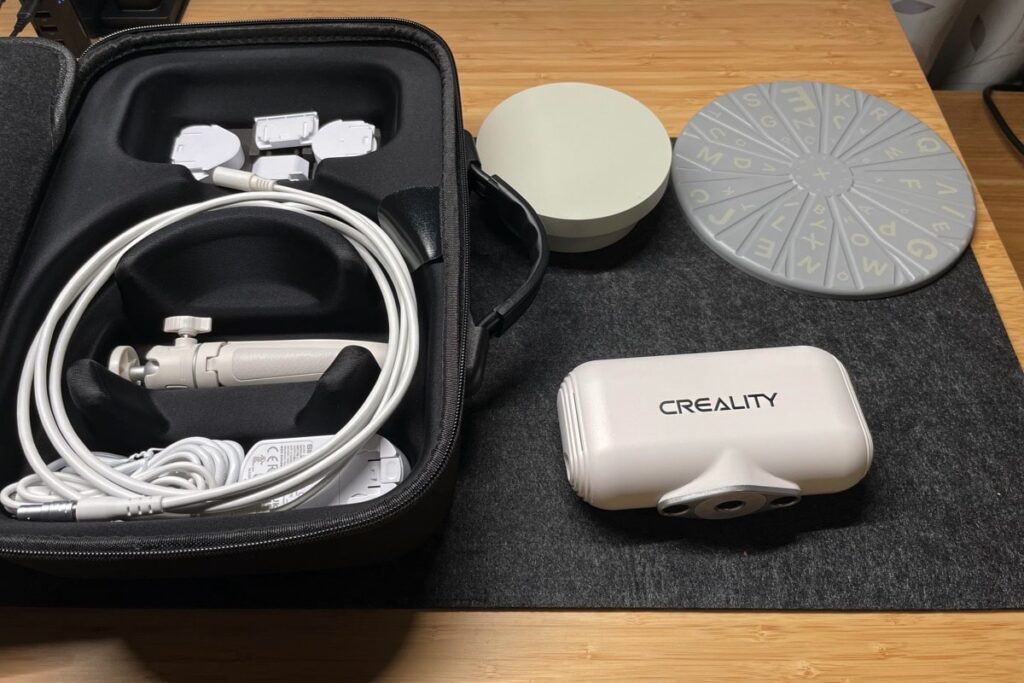
Creality CR-Scan Lizardの付属品を確認します。
今回ののMakuakeプロジェクトでは標準セット、プレミアムセット、カラーキットセットの3つのセット内容が用意されているとのこと。今回お借りしたのはそのうちの「プレミアムセット」に該当するようです。
- スキャナー本体
- 電源アダプタ&プラグ
- データ転送用ケーブル
- モバイルバッテリー用ケーブル
- USBドライブ
- ターンテーブル
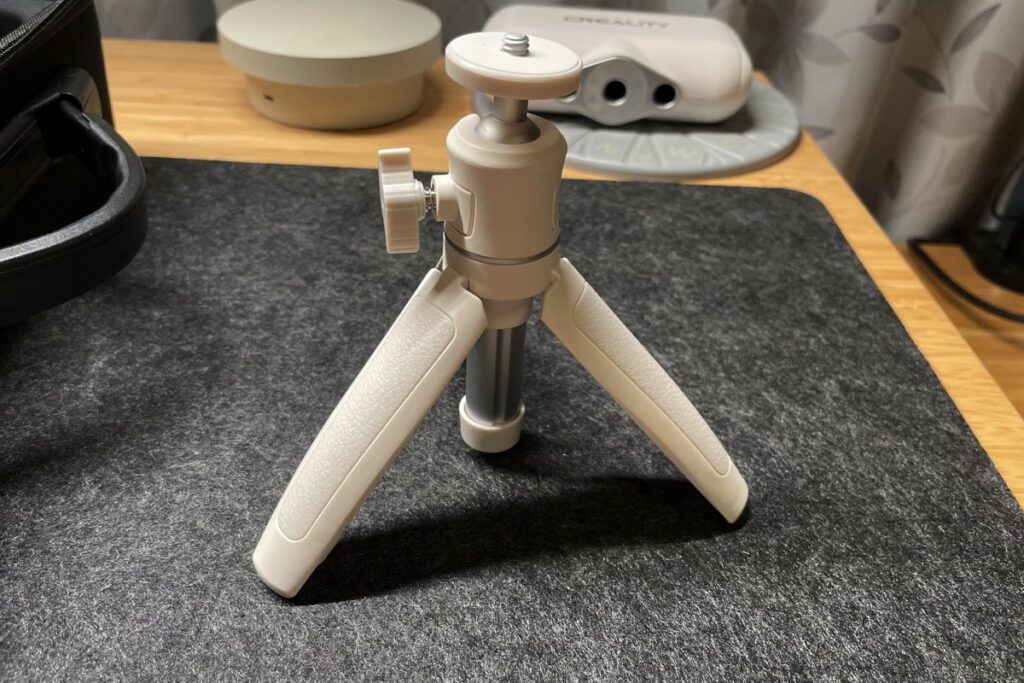
- 三脚
- キャリーケース
- 説明書 など
キャリーケース
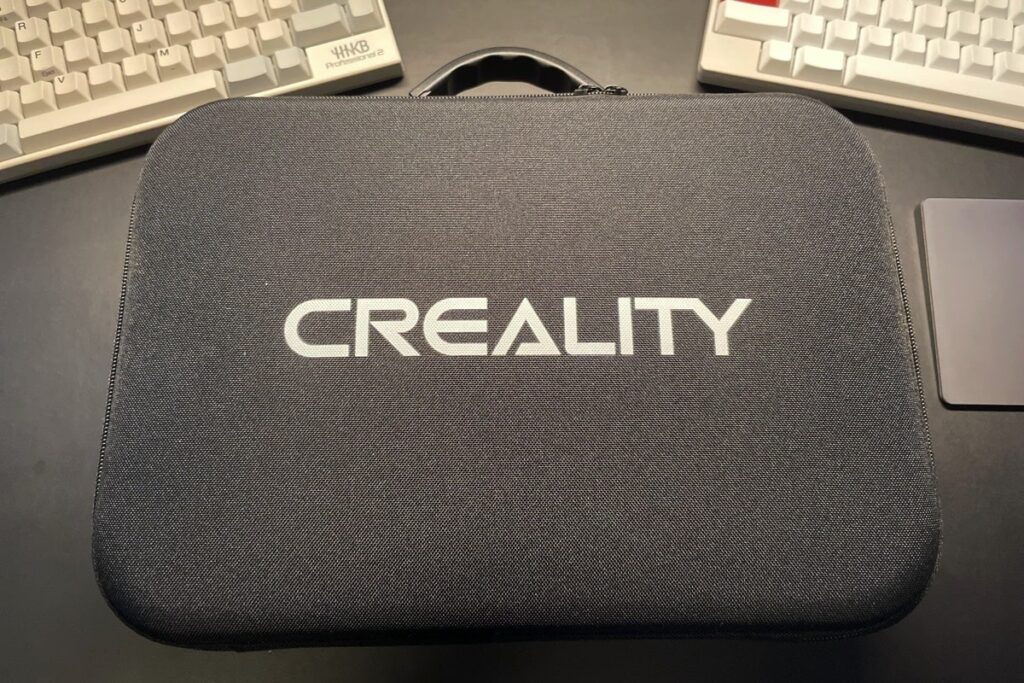
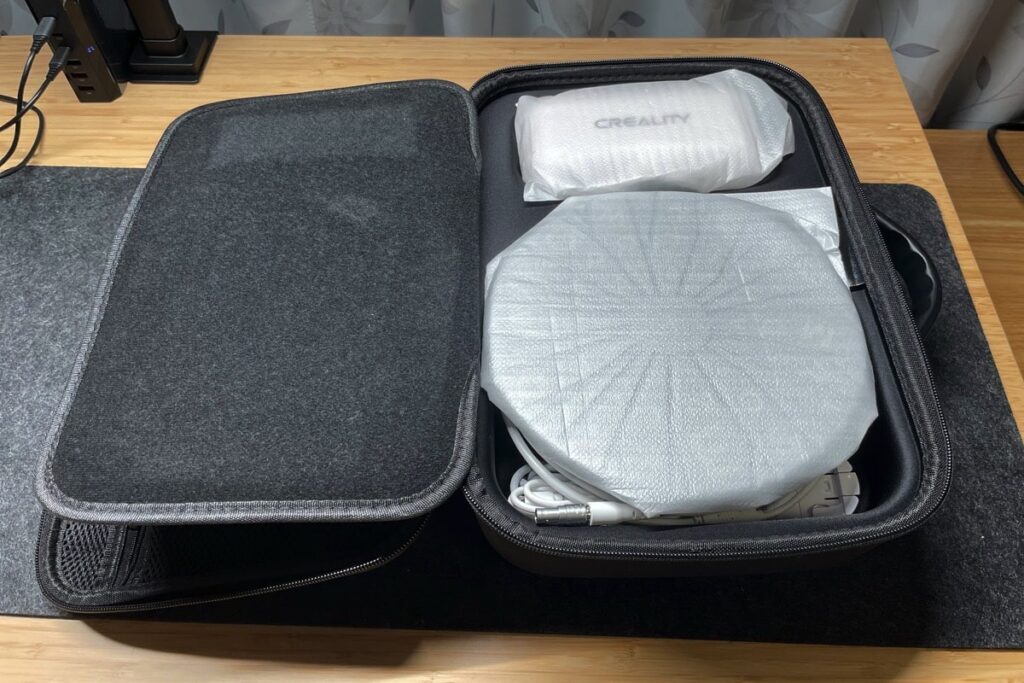
持ち運びに便利な専用ケースはしっかりと本体を保護。
実際、持ち運ぶケースが増えそうなCreality CR-Scan Lizardです。このケースはかなり嬉しいです。
このケースを目的に「プレミアムセット」を選ぶのもありじゃない?
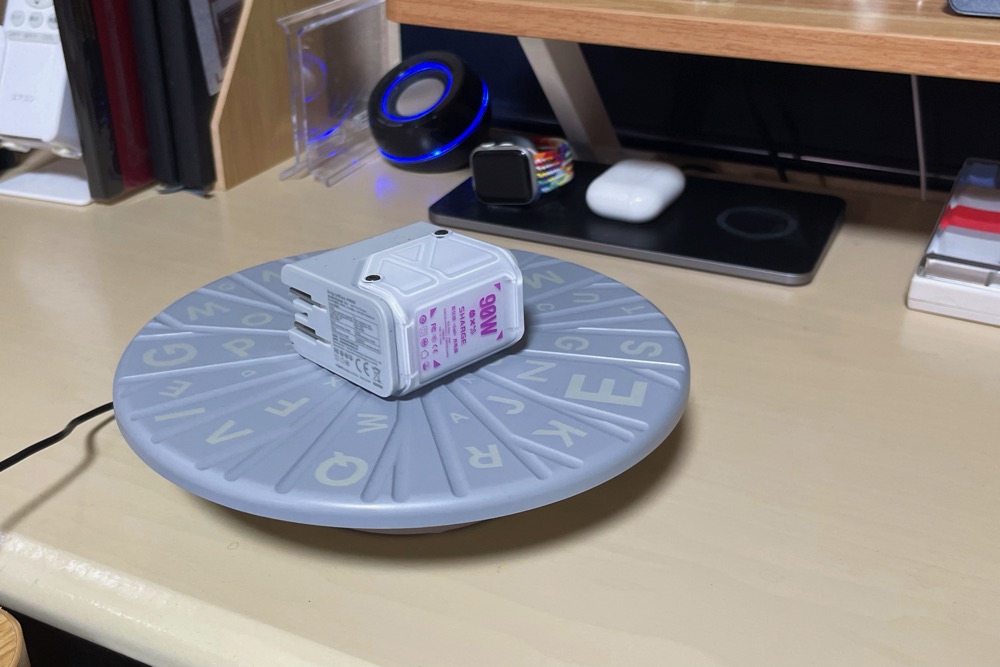
電源アダプタ&プラグ
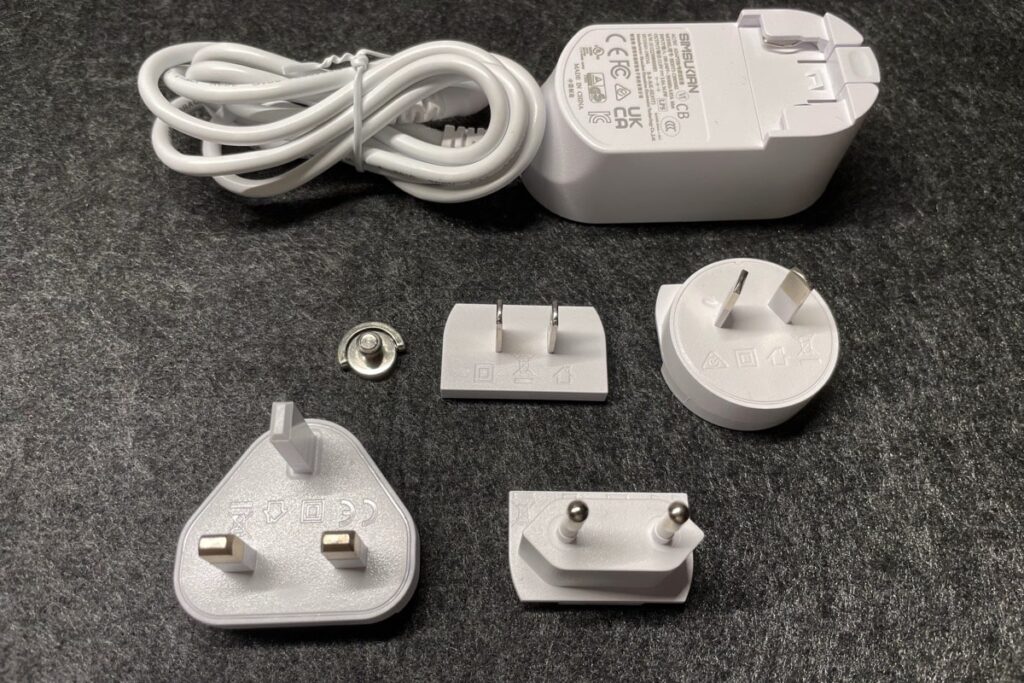
グローバル仕様な電源プラグです。
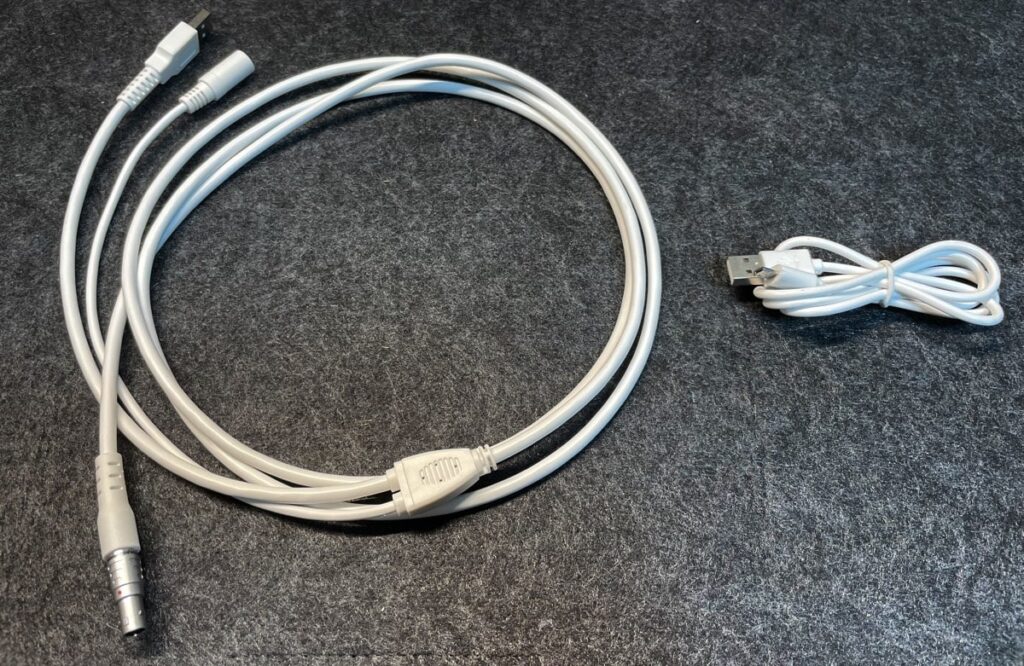
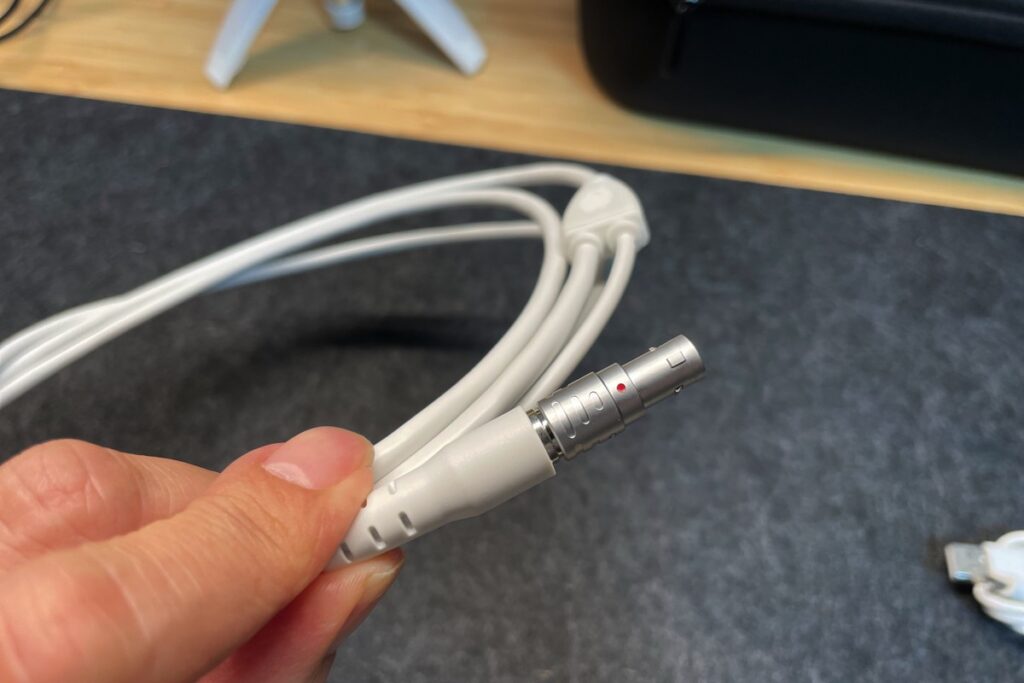
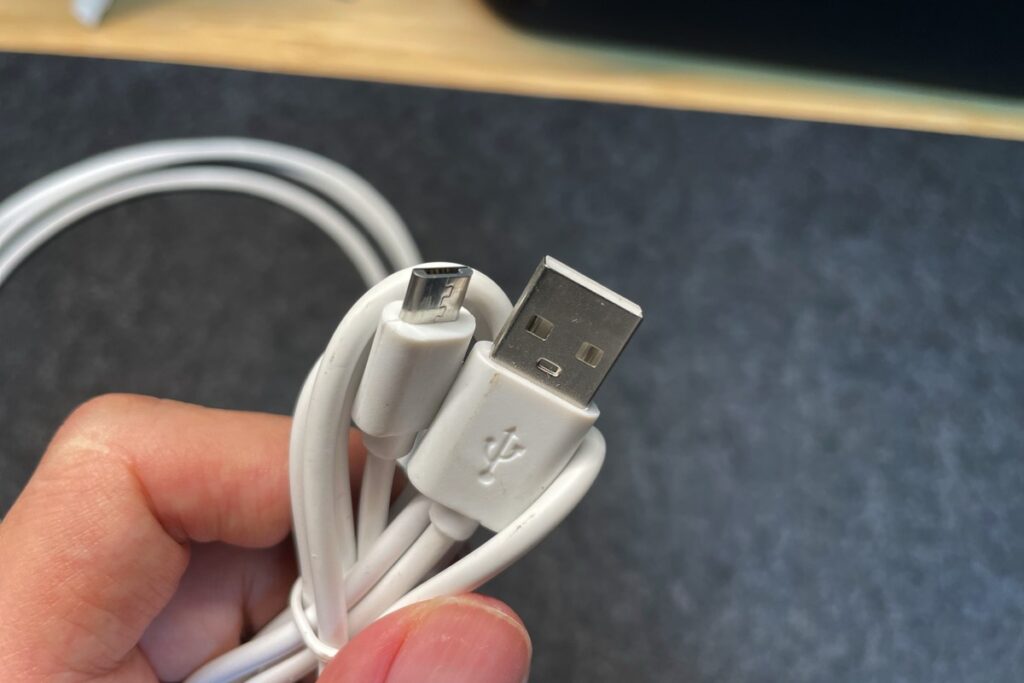
ケーブル類
USBドライブ&説明書など

専用ソフト「CR Studio」やマニュアルなどが収められているUSBドライブ。
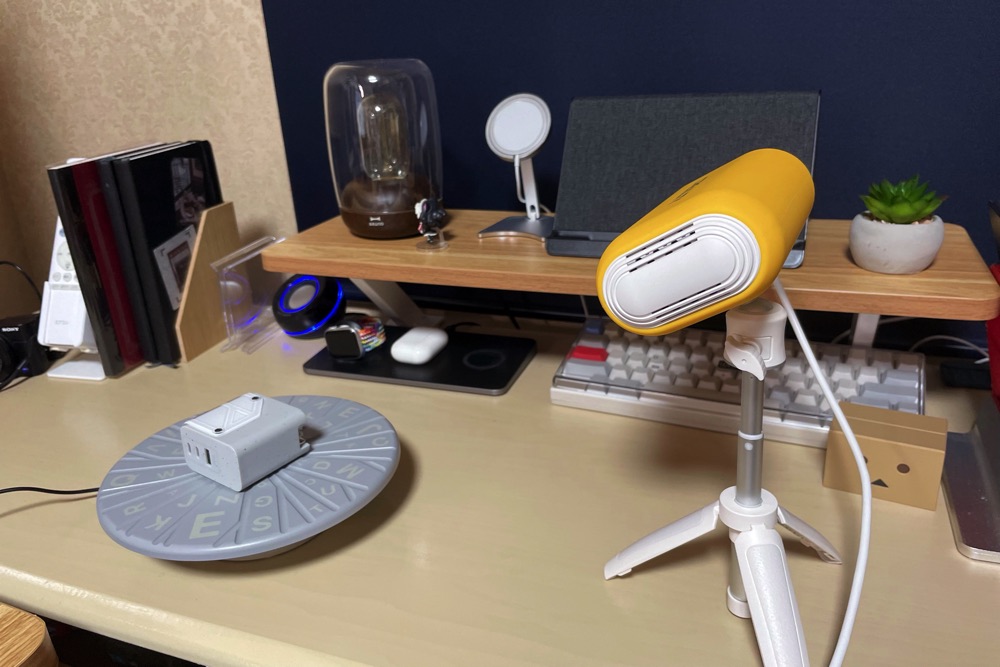
ターンテーブル
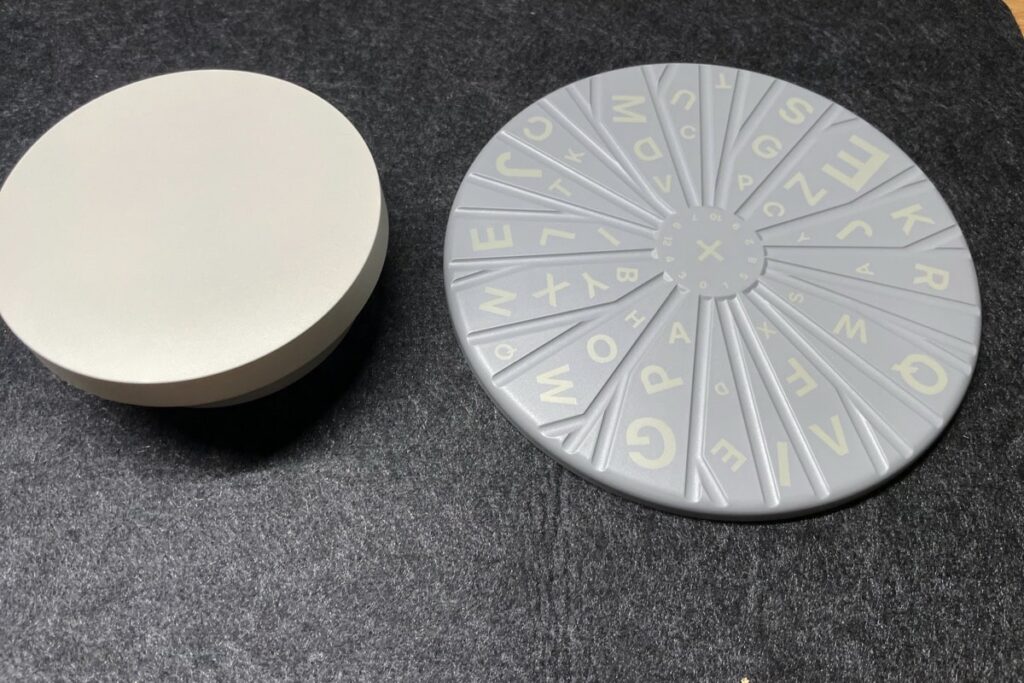
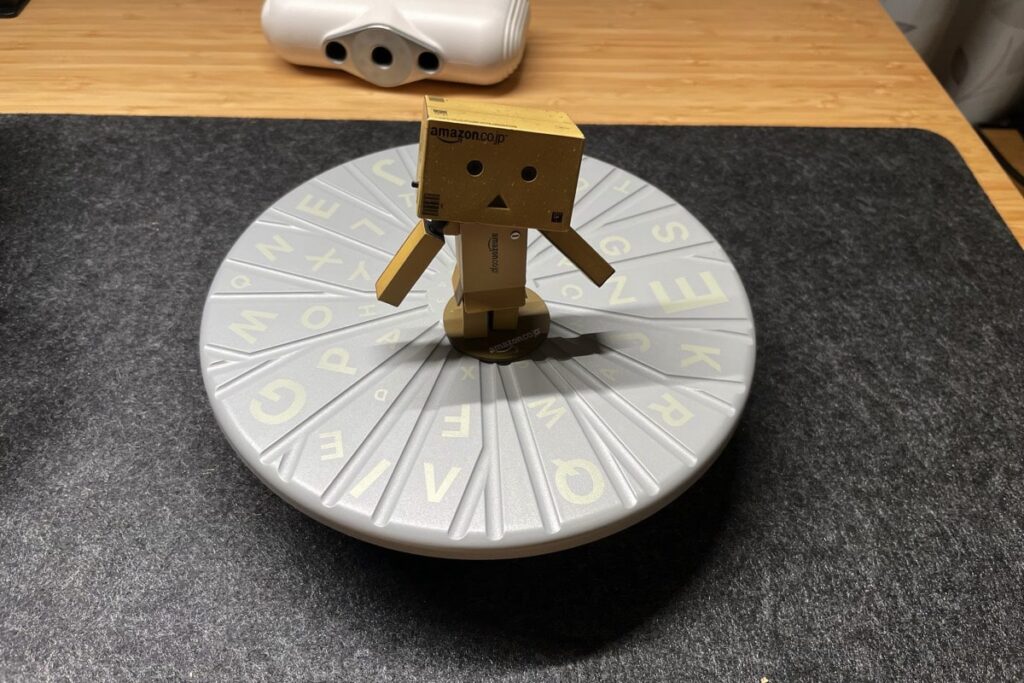
撮影時に使用するターンテーブル。
ひでターンテーブルに印刷されているアルファベットは専用ソフトに認識させるためのもの(初期化)なんですね。
三脚
ラバーケース(キャンペーン製品)
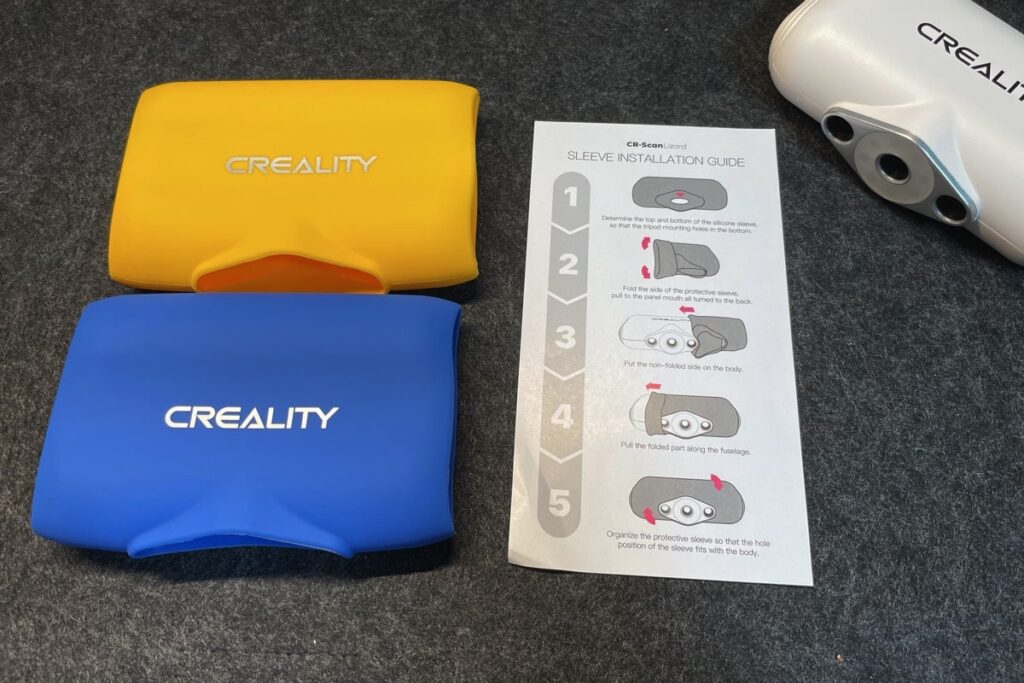
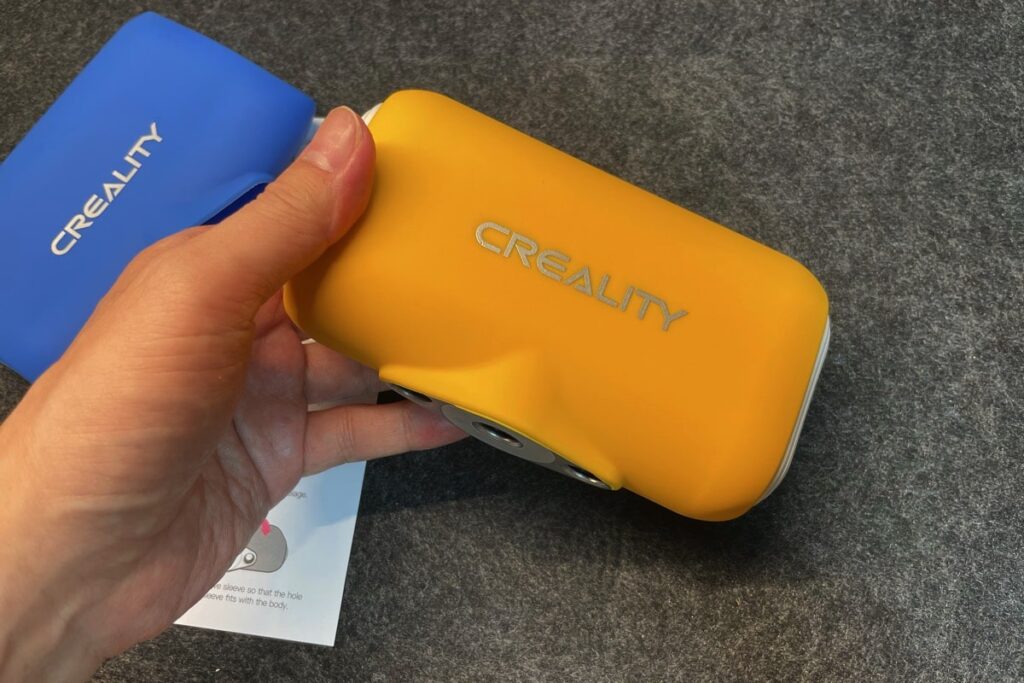

本体保護のための2色のラバーケースが同梱されていました。
こちらはMakuakeでの応援購入総額が3,000万に達したらプレゼントされるものの様です。(すでに達成済み!)ブルー、イエロー、グレーの3色の中から一つをランダムでもらえるとのこと。
イエローが可愛くて好き♪
まとめ|最新の3Dスキャナーを初体験してみた結果
最高の3D体験を!マーカー不要・片手操作、超高精度3DスキャナーCreality。
「本当にまったくの初心者でも手軽に使うことができるのか?」
そんな疑問からスタートした今回の検証。想定外のトラブルもありましたが、充分にその手軽さを体感することができました。
使いこなせているかといえばまだまだですが、それでも・・・
ひで僕のような素人でも手軽に使える!というのは本当でした♪
写真や動画も素敵です。でもそろそろ思い出はカタチで残す時代が来るのかもしれないですね。
そろそろ3Dプリンターの勉強も始めないと。
そんな3Dスキャナー「Creality CR-Scan Lizard」は現在Makuakeにてプロジェクト中。プロジェクト終了は2022年5月30日とのこと。
今ならまだ限定価格での応援購入も間に合います。
少しでもこの「Creality CR-Scan Lizard」に興味をもっていただけたとのことでしたら、ぜひお早めにこちらのページをチェックしてみてください。
\ 5月30日にてプロジェクト終了 !!/